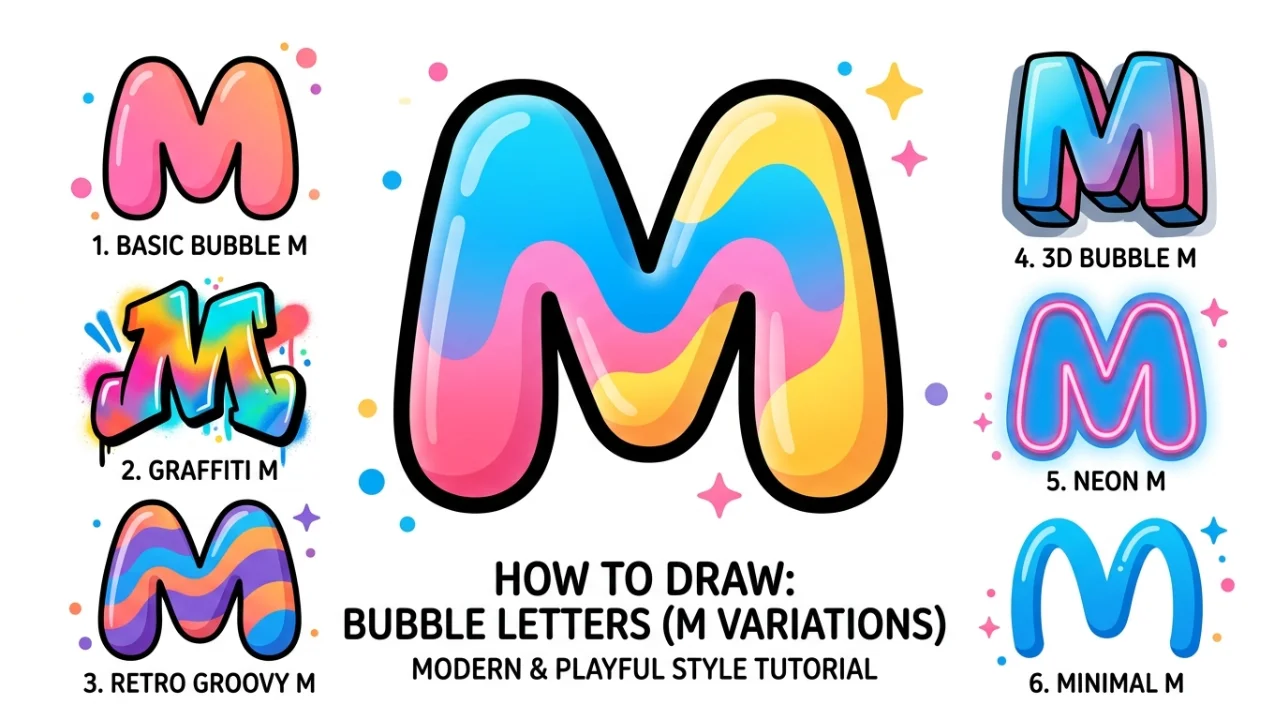
M in Bubble Letter Draw Step by Step Guide for Beginners
If you enjoy creative lettering, learning how to draw m in bubble letter is a fun and useful skill. Bubble letters look bold, soft, and rounded, which makes them perfect for posters, school projects, social media art, and even graffiti-style designs. Many beginners start with simple shapes, and the letter “M” is a great place to begin because it has clear curves and structure.
Need To Know: Bubble Graffiti Letters Guide Easy Steps, Styles Tips for Beginners
In this guide, you will learn what bubble letters are, how to draw them step by step, different styles you can try, and tips to make your lettering stand out. This article keeps things simple, clear, and practical so you can start drawing right away without wasting time.
What Are M In Bubble Letter?
Bubble letters are a type of lettering style where each letter looks puffy and rounded, like bubbles. Artists often use thick outlines and smooth curves to create this effect. These letters feel playful and eye-catching, which is why they are popular in art and design.
When you draw m in bubble letters, you focus on turning sharp edges into soft curves. This creates a bold and friendly look that stands out on any page.
Key Features of Bubble Letters
| Feature | Description |
|---|---|
| Rounded edges | No sharp corners, only smooth curves |
| Thick outlines | Letters look bold and strong |
| Playful style | Fun and creative appearance |
| Easy to customize | You can add colors, shadows, and patterns |
Why Learn Bubble Letter “M”?
The letter “M” has a unique shape with curves and peaks. This makes it perfect for learning control and balance in bubble lettering. When you master m in bubble letters, you build a strong base for drawing other letters.
Here are a few reasons to learn it:
- It improves your hand control
- It helps you understand spacing and curves
- It builds confidence in creative lettering
Step-by-Step Guide to Draw Bubble Letter M
Follow these simple steps to draw your own bubble letter M. Take your time and practice slowly.
Step 1: Draw the Basic Shape
Start by sketching a simple “M” using light pencil lines. Keep it straight and balanced. This will act as your guide.
Step 2: Add Rounded Edges
Now, go around your “M” and add a thick outline. Make sure all corners are curved instead of sharp. This is the most important step when creating m in bubble letter.
Step 3: Smooth the Curves
Look at your outline and adjust any uneven lines. Keep the curves smooth and even on both sides.
Step 4: Erase Inner Lines
Erase the original thin “M” inside your outline. Now you will see a clean bubble letter shape.
Step 5: Add Details
You can now decorate your letter. Add shadows, highlights, or patterns to make it look more interesting.
Common Styles of Bubble Letter M
There is no single way to draw bubble letters. You can experiment with different styles to create unique designs.
Basic Bubble Style
This is the simplest version. It uses smooth curves and even thickness. Beginners should start here.
Graffiti Style
This style looks more artistic and bold. It often includes sharp bends mixed with curves, along with extra details like arrows or drips.
3D Bubble Letters
In this style, you add depth to the letter by drawing a shadow or side view. It makes the letter look like it is popping out.
Decorative Style
You can fill your letter with patterns like dots, stripes, or gradients. This adds personality to your design.
| Style | Difficulty | Best For |
|---|---|---|
| Basic | Easy | Beginners |
| Graffiti | Medium | Creative projects |
| 3D | Medium | Posters and titles |
| Decorative | Easy | Personal designs |
Tips to Improve Your Bubble Letter Skills
If you want to get better at drawing m in bubble letter, you should focus on consistency and creativity.
Keep your lines smooth and steady. Avoid shaky outlines because they make your letters look messy.
Practice spacing. Make sure both sides of the “M” look balanced.
Use pencil first. Always sketch lightly before finalizing with a pen or marker.
Experiment with colors. Bright colors make bubble letters more attractive.
Add shadows carefully. Shadows create depth but should stay consistent in one direction.
Mistakes to Avoid
Many beginners make small mistakes that affect their final design. Avoid these common issues:
- Drawing uneven curves
- Making lines too thin
- Forgetting to erase guide lines
- Overcrowding with too many details
When you practice m in bubble letter, focus on clarity first before adding complex designs.
Tools You Can Use
You do not need expensive tools to start. Simple materials work perfectly.
| Tool | Purpose |
|---|---|
| Pencil | Sketching the base shape |
| Eraser | Cleaning up mistakes |
| Marker | Bold outlines |
| Colored pens | Adding style and color |
| Paper or sketchbook | Practice surface |
Digital tools like drawing apps also work well if you prefer digital art.
Creative Ideas for Bubble Letter M
Once you learn the basics, you can use your skills in many ways. Here are some creative ideas:
- Design your name using bubble letters
- Create posters for school projects
- Make greeting cards
- Decorate notebooks or journals
- Practice graffiti-style art
Using m in bubble letters in real projects helps you improve faster because you apply what you learn.
Benefits of Learning Bubble Lettering
Bubble lettering is not just fun—it also helps develop useful skills.
Improves creativity: You learn to think in new ways and design unique styles.
Builds focus: Drawing requires attention to detail.
Enhances motor skills: It improves hand control and coordination.
Boosts confidence: Creating art gives a sense of achievement.
How Long Does It Take to Learn?
You can learn the basics of bubble lettering in one day. However, mastering it takes practice. If you practice daily, you will see improvement within a week.
Focus on drawing m in bubble letters repeatedly until you feel comfortable. Once you master one letter, others become easier.
Practice Routine for Beginners
A simple routine can help you improve quickly.
Start by drawing the letter “M” five times daily.
Then try different styles each day.
Add colors and shading after you feel confident.
Review your work and correct mistakes.
Consistency matters more than speed. Even 10 minutes a day can make a big difference.
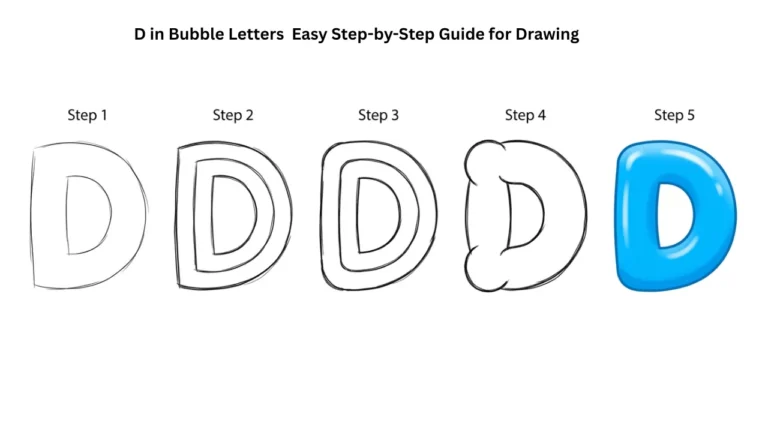
Need To Know: D in Bubble Letters Easy Step-by-Step Guide for Drawing
Conclusion
Learning how to draw m in bubble letter is simple, fun, and useful. You only need basic tools, a little patience, and regular practice. Start with a simple shape, add rounded outlines, and then explore creative styles. Focus on smooth curves, balanced design, and clean finishing.
With time, your skills will improve, and you will be able to create bold and eye-catching lettering for any project. Keep practicing, stay creative, and enjoy the process of turning simple letters into art.